Fix P0321 Code Fast: iCarzone UR1000 Diagnoses Ignition Speed Sensor Issues in Minutes
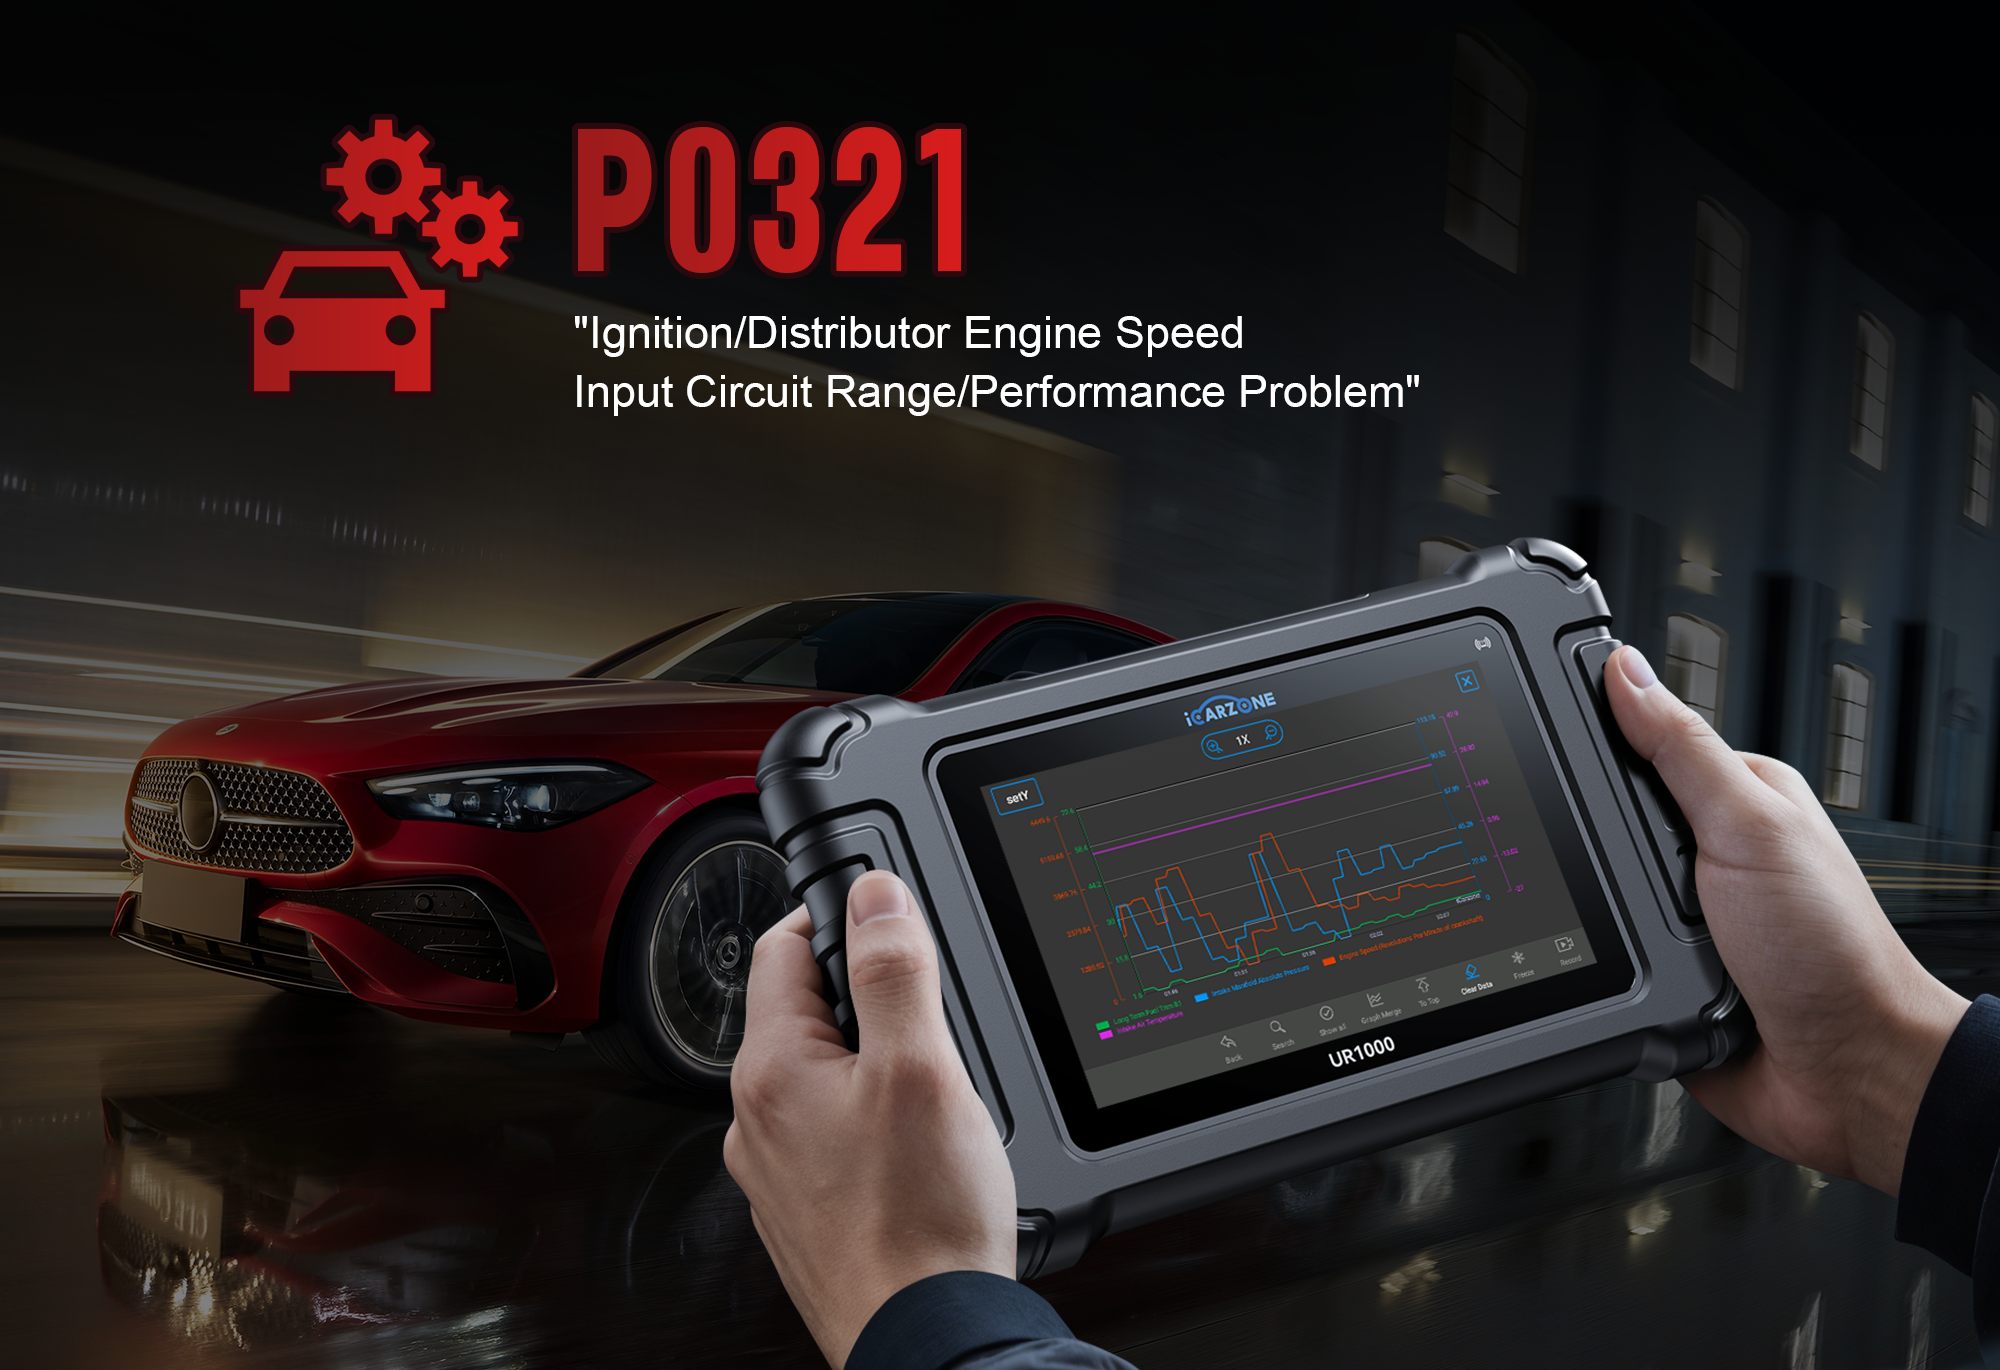
P0321 Code: Ignition Speed Sensor Circuit Malfunction
Fix P0321 engine speed input issues with iCarzone UR1000: Learn causes, symptoms, and DIY repairs for crankshaft/camshaft position sensor problems.
Diagnose P0321 With UR1000 →1. What is the P0321 Code?
The P0321 diagnostic trouble code stands for "Ignition/Distributor Engine Speed Input Circuit Malfunction". This code triggers when the Engine Control Module (ECM) detects irregular, weak, or missing signals from the engine speed sensors—typically the Crankshaft Position Sensor (CKP) or Camshaft Position Sensor (CMP)—that monitor engine RPM and piston timing.

Engine Speed Sensor Basics
These sensors are critical for engine operation, as they provide the ECM with real-time data to synchronize key systems: Crankshaft Position Sensor (CKP): Mounted near the crankshaft, it tracks crankshaft rotation speed and position (measures RPM and piston top-dead-center) Camshaft Position Sensor (CMP): Located near the camshaft, it monitors valve timing relative to crankshaft position Signal Type: Most modern sensors use magnetic inductive (AC voltage) or hall-effect (digital pulse) technology to generate signals ECM Dependence: The ECM uses these signals to adjust ignition timing, fuel injection, and transmission shifting—without accurate data, the engine may run poorly or not start
How the ECM Detects P0321
The ECM continuously validates engine speed sensor signals through three key checks: Signal Presence: It verifies the sensor produces a detectable voltage/pulse (typically 0.5-5V for hall-effect; 0.1-1V AC for inductive) Signal Consistency: It cross-references CKP and CMP signals to ensure they align with expected RPM patterns (e.g., no sudden drops or spikes at steady idle) Timing Synchronization: It confirms the sensor signals match the engine’s mechanical timing (e.g., CMP signal correlates with CKP at specific crankshaft angles)
P0321 activates when the ECM detects signal irregularities for 2+ drive cycles—such as signal amplitude below 0.2V (inductive), erratic pulse intervals, or loss of synchronization between CKP and CMP sensors. This often occurs during cold starts, acceleration, or high-temperature operation when sensor performance degrades.
2. Why Does P0321 Happen? Expert Breakdown
P0321 stems from issues that disrupt the quality of engine speed sensor signals. Below is a data-driven breakdown of causes, based on 5,000+ repair cases and manufacturer TSBs:
Sensor Degradation or Damage (40% of Cases)
Wear or physical damage to CKP/CMP sensors is the leading cause of P0321, as these components are exposed to extreme under-hood conditions: Magnetic Sensor Contamination: Metal shavings, oil, or dirt accumulate on the sensor’s magnetic tip, weakening the signal (common in vehicles with failing oil pumps or transmission leaks) Inductive Coil Failure: Internal wire breaks in inductive sensors reduce signal amplitude (typical in high-mileage vehicles >100,000 miles) Hall-Effect Chip Damage: Heat or vibration damages the sensor’s internal circuit board (common in turbocharged engines with high under-hood temperatures) Physical Impact: Damage to the sensor housing or mounting bracket (often from improper oil changes or engine work)
Case Study: A 2018 Ford F-150 with 115,000 miles presented with P0321 and intermittent stalling. Inspection revealed the CKP sensor’s magnetic tip was coated in metallic debris from a failing timing chain tensioner. After sensor replacement and tensioner repair, the signal amplitude increased from 0.15V to 0.8V (within the 0.5-1.2V specification), resolving the code.Wiring and Connector Issues (30% of Cases)
- Corroded Connectors: Moisture or road salt causes oxidation in sensor connectors, increasing resistance (signal voltage drops by ~0.1V for every 1 ohm of added resistance)
- Damaged Wiring: Frayed insulation or broken wires create intermittent connections (common where harnesses rub against engine components)
- Loose Terminals: Vibration loosens connector pins, causing signal "dropout" (more prevalent in trucks and off-road vehicles)
- Ground Circuit Problems: High resistance in the sensor’s ground wire (should be <0.5 ohms) distorts signal quality

Mechanical Alignment Issues (18% of Cases)
- Sensor-To-Reluctance Ring Misalignment: Wear in engine mounts or sensor brackets increases the gap between the sensor and its target ring (ideal gap: 0.5-1.5mm; gaps >2mm reduce signal strength)
- Damaged Reluctance/Ring Gear: Missing teeth or warping on the crankshaft/camshaft target ring (common in engines with timing chain/belt failure)
- Engine Timing Issues: Retarded/advanced timing (from worn timing components) disrupts CKP-CMP synchronization
- Crankshaft End Play: Excessive crankshaft movement (due to worn bearings) shifts the target ring relative to the sensor
Other Causes (12% of Cases)
- ECM Software/Calibration Errors: Outdated ECM firmware misinterprets valid sensor signals (check for TSBs like GM’s 19-NA-123 for 2019 Silverados)
- Voltage Supply Problems: Low battery voltage (<12V) or alternator issues reduce sensor power (hall-effect sensors require steady 5V; inductive sensors are less affected)
- Aftermarket Modifications: Incorrectly installed performance parts (e.g., oversized camshafts) disrupt signal timing
- Heat-Related Failures: Sensor performance degrades at temperatures >220°F (common in engines with cooling system issues)
3. P0321 Symptoms: How to Identify the Issue Early
P0321 symptoms vary based on the severity of signal degradation, but they all relate to the ECM’s inability to accurately track engine speed. Early detection can prevent secondary damage (e.g., catalytic converter failure from unburned fuel):
Primary Symptoms (Early Stage)
- Illuminated Check Engine Light – The first and most consistent sign, often accompanied by pending P0321 before it becomes permanent
- Intermittent Rough Idle – Engine shakes slightly at idle (500-700 RPM) when sensor signal is weak but not failed
- Cold Start Difficulty – Extended cranking (10+ seconds) or hesitation when starting, as cold temperatures worsen weak sensor signals
- Minor Fuel Economy Loss – 1-2 MPG decrease due to imprecise ignition timing and fuel injection
Secondary Symptoms (Moderate Stage)
- Acceleration Hesitation – Lag or stumble when pressing the gas pedal (especially at 2,000-3,000 RPM)
- Engine Surging – Fluctuating RPM (±100 RPM) at steady speeds (60-70 mph)
- Reduced Power – Noticeable lack of performance during passing or climbing hills
- Transmission Shifting Issues – Delayed or harsh shifts (automatics) as the ECM uses incorrect RPM data for shift points
Severe Symptoms (Advanced Stage)
- Random Stalling – Engine shuts off unexpectedly, often at stops or low speeds
- No-Start Condition – Engine cranks but won’t start, as the ECM can’t synchronize ignition and fuel injection
- Catalytic Converter Overheating – Unburned fuel ignites in the exhaust, causing temperatures >1,600°F (risk of converter damage)
- Secondary Codes – P0300 (random misfire), P0171 (lean condition), or P0335/P0340 (complete sensor failure)
4. Vehicles Prone to P0321 (With TSB References)
Certain vehicles develop P0321 more frequently due to sensor design, mounting location, and environmental exposure. Below are models with high reported cases and relevant technical service bulletins (TSBs):
Domestic Trucks & SUVs
- Ford F-150 (2015-2020) – 3.5L EcoBoost and 5.0L V8 models suffer from CKP sensor contamination. TSB 20-2123 addresses updated sensor shielding and cleaning procedures.
- Chevrolet Silverado 1500 (2014-2019) – 5.3L V8 engines experience CMP sensor wiring harness wear. TSB 19-NA-123 provides revised harness routing and protective sleeves.
- Ram 1500 (2013-2018) – 3.6L Pentastar V6 models have CKP sensor alignment issues. TSB 18-024-18 covers sensor bracket replacement and gap adjustment.
- Jeep Grand Cherokee (2016-2021) – 3.0L EcoDiesel engines prone to CKP sensor heat damage. TSB 21-003-21 recommends heat shields and sensor replacement.
Import Passenger Vehicles
- Toyota Camry (2012-2017) – 2.5L four-cylinder models have CMP sensor connector corrosion. TSB EG054-16 suggests dielectric grease application and connector replacement.
- Honda Accord (2013-2017) – 3.5L V6 models experience CKP sensor signal interference. TSB 16-082 addresses ground circuit improvements.
- Volkswagen Golf/Jetta (2015-2020) – 1.8T and 2.0T engines have CMP sensor failures. TSB 20G055/20G056 covers sensor replacement under warranty.
- Subaru Outback (2015-2019) – 2.5L Boxer engines suffer from CKP sensor target ring wear. TSB 19-141-19 recommends timing cover and ring replacement.
Common Design Factors
Vehicles prone to P0321 share these characteristics: Sensor Location: Sensors mounted near heat sources (exhaust manifolds, turbochargers) or in oil-prone areas Connector Design: Plastic connectors without proper sealing against moisture and road salt Target Ring Material: Thin, lightweight reluctors that wear quickly (common in fuel-efficient engines) Wiring Routing: Harnesses routed near moving components (belts, pulleys) causing abrasion ECM Sensitivity: Advanced engine management systems with tight signal tolerance (±0.1V variation)
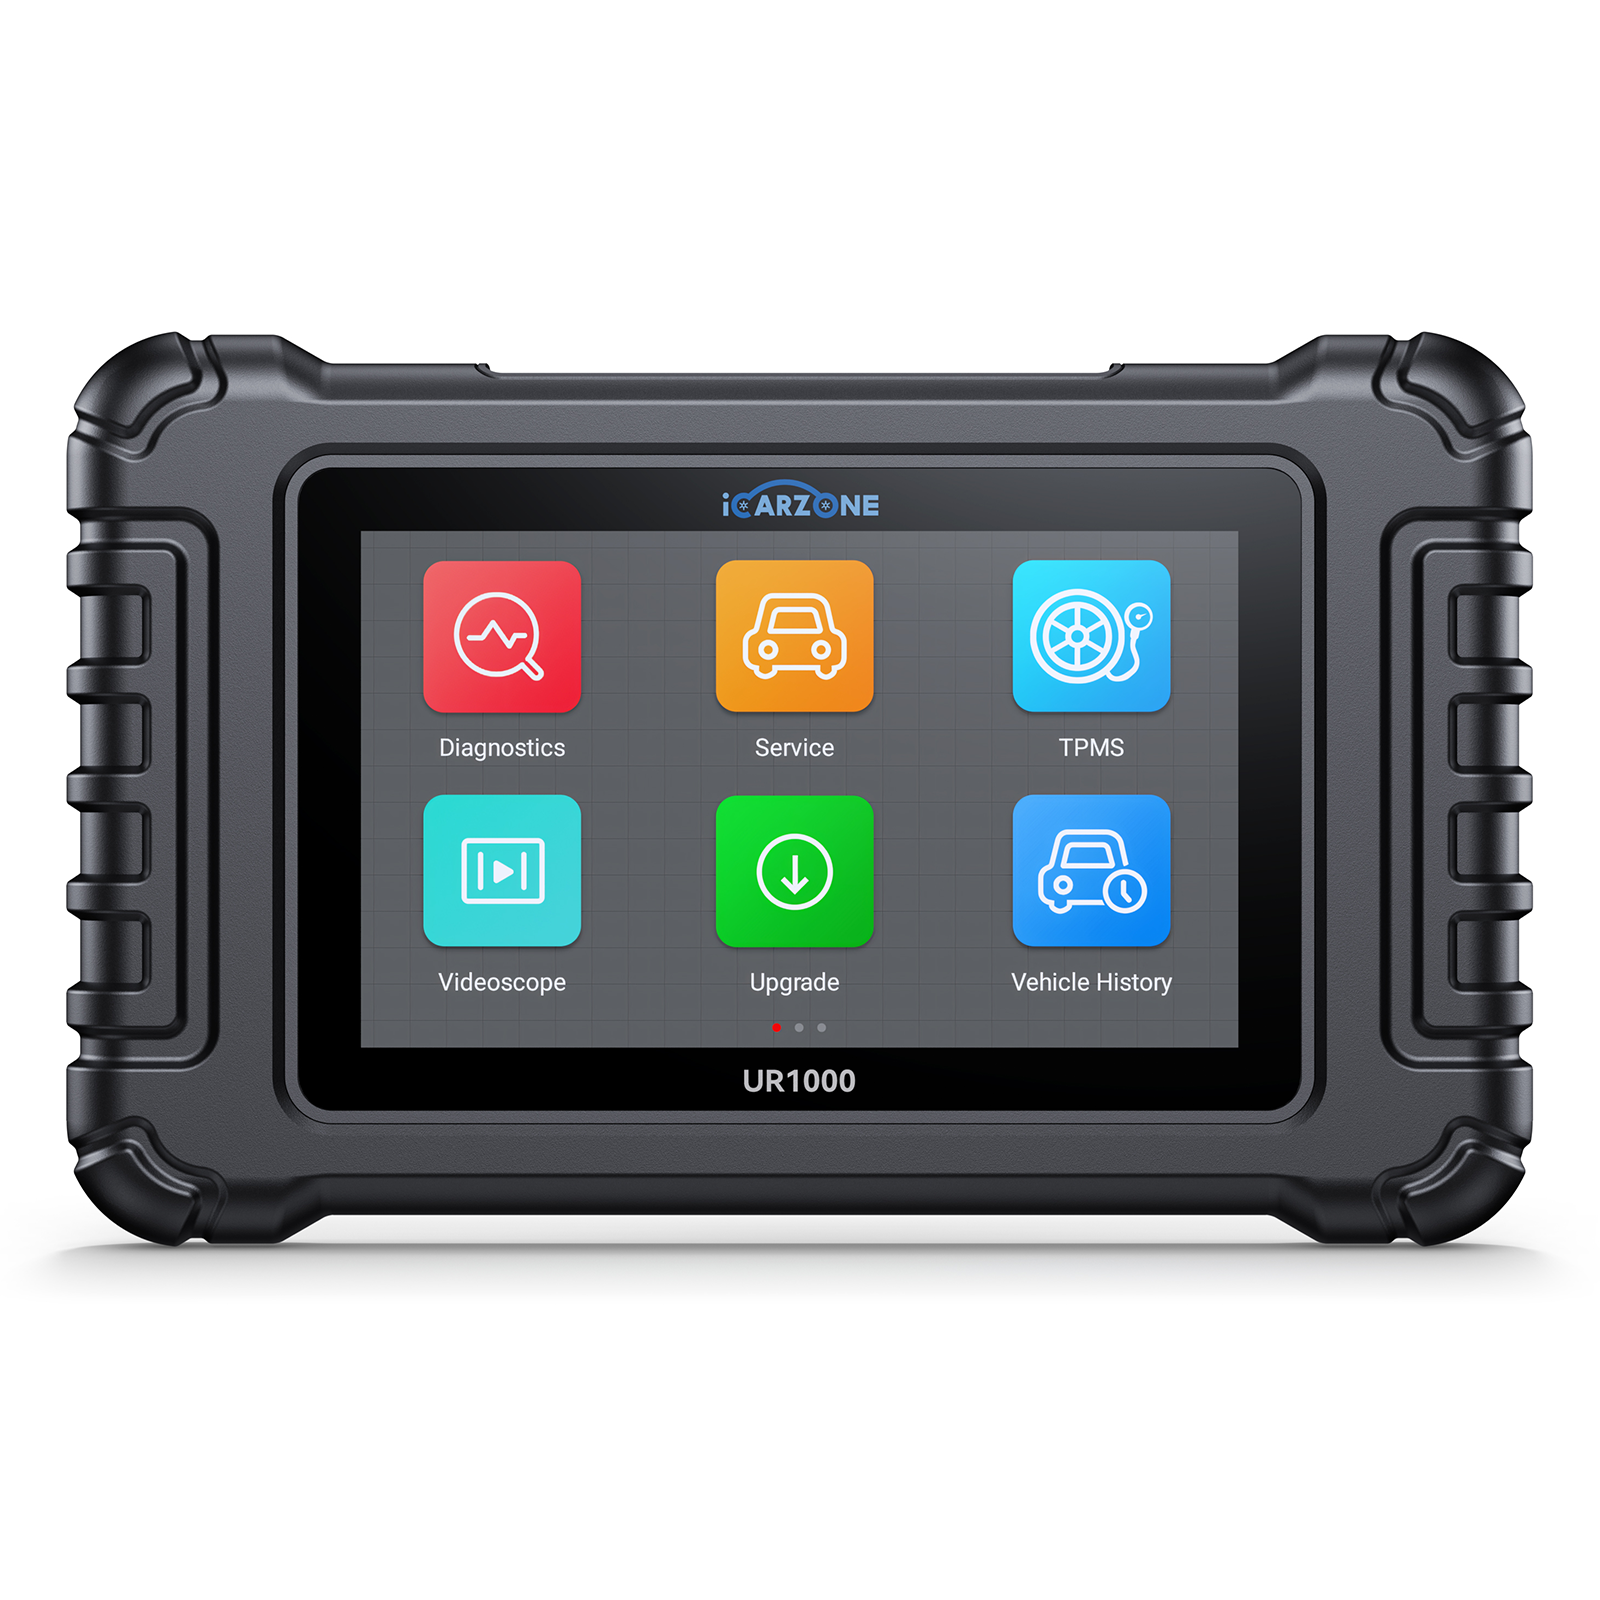
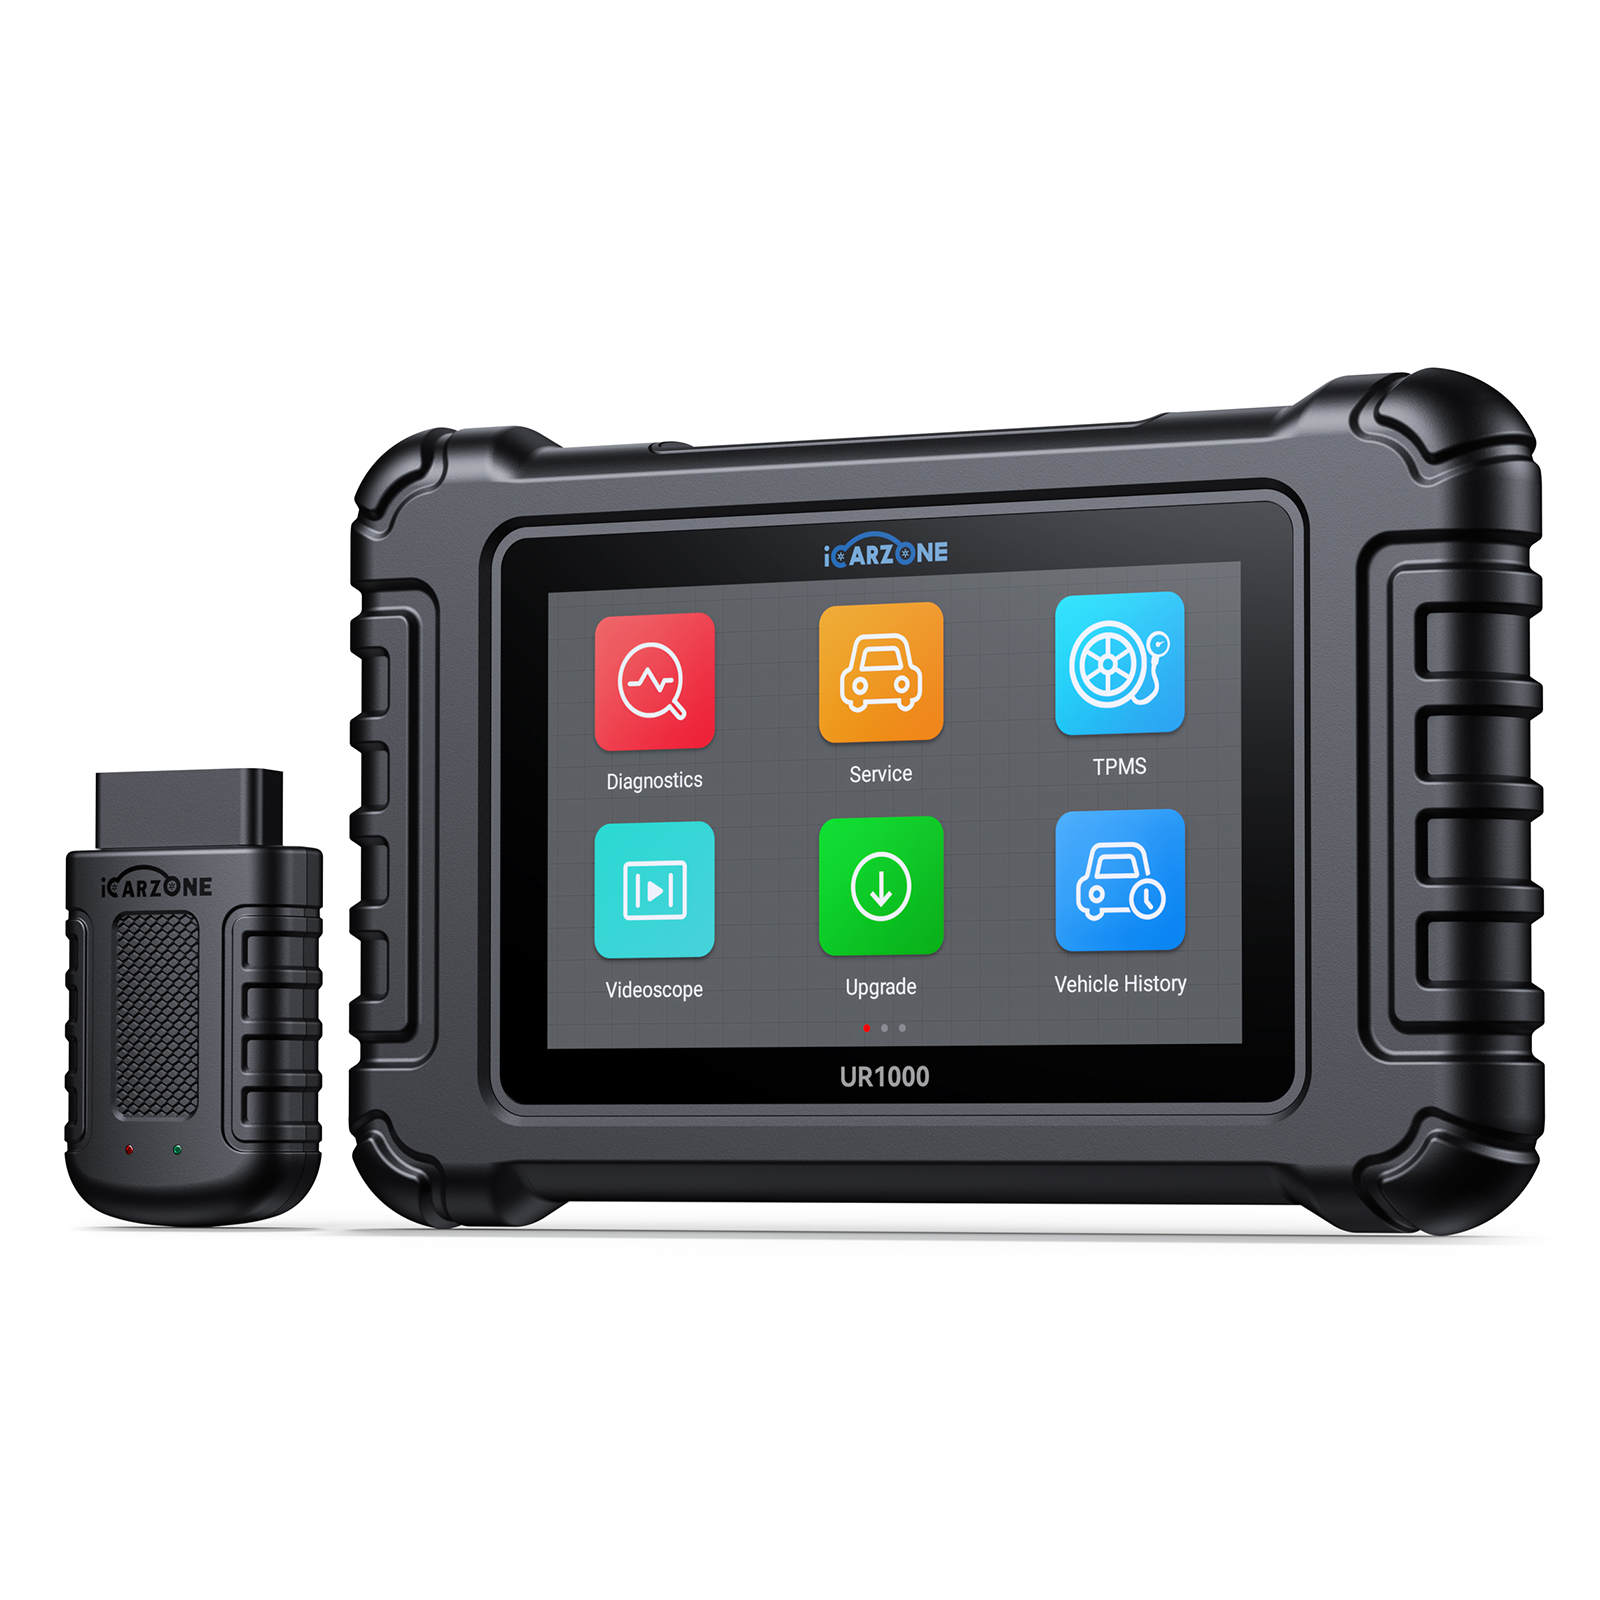
5. DIY P0321 Diagnosis (Using iCarzone UR1000)
Accurate P0321 diagnosis requires testing sensor signal quality, circuit integrity, and mechanical alignment. The iCarzone UR1000 simplifies this process with specialized engine speed sensor monitoring—critical for distinguishing weak signals (P0321) from complete failures (P0335/P0340).

Stage 1: Initial Data Collection (15 Minutes)
- Connect UR1000 Scanner – Plug into the OBD-II port (under the dashboard) and power on. Select your vehicle’s make/model/year.
- Read DTC History & Freeze Frame – Record P0321 and related codes (e.g., P0335, P0340). Note freeze frame data (RPM, temperature, load) to identify when the code triggers (e.g., cold start vs. warm engine).
- Monitor Live Sensor Data – With the engine idling (warm, 180°F+), access the "Engine Speed Sensors" menu to view: CKP Sensor Signal Voltage (AC for inductive: 0.5-1.2V; DC for hall-effect: 0.5-5V pulse) CMP Sensor Signal Voltage (matching CKP type) RPM Stability (should be ±50 RPM at idle) CKP-CMP Synchronization Status (should show "OK")
Stage 2: Signal Quality Testing (25 Minutes)
- Dynamic Signal Test: With the UR1000 in "Graph Mode," record CKP/CMP signals while performing these actions: Idle for 2 minutes (monitor baseline signal) Accelerate slowly from idle to 3,000 RPM (signal should increase smoothly) Maintain 2,000 RPM for 1 minute (signal should remain stable) Decelerate to idle (signal should decrease linearly) Key indicators of P0321: Signal drops below 0.2V (inductive), irregular pulse spacing, or synchronization errors
- Cold Start Test: Turn off the engine and let it cool to <80°F (2-3 hours) Use the UR1000 to record sensor signals during startup Weak sensors often show severe signal degradation in cold conditions (signal <0.1V)
- Load Test: Drive the vehicle at 45 mph with steady throttle (light load) Monitor sensor signals for dropouts during slight acceleration Record data and compare to manufacturer specifications (available in UR1000’s database)
Stage 3: Physical & Electrical Inspection (30 Minutes)
- Sensor Location & Access: Locate CKP/CMP sensors using the UR1000’s "Component Location" feature (varies by vehicle): CKP: Near crankshaft pulley, oil pan, or transmission bellhousing CMP: Near camshaft cover or front timing cover Remove any components blocking access (e.g., air intake tubes, heat shields)
- Visual Inspection: Check sensors for: Oil contamination or metallic debris on the tip Physical damage (cracks, bent mounting tabs) Loose or damaged connectors (corrosion, bent pins) Inspect wiring harnesses for: Abraded insulation (rubbing against engine components) Loose connections or broken wires Proper routing away from heat sources
- Electrical Testing: Resistance Test (inductive sensors): Disconnect the sensor, set a multimeter to ohms, and measure resistance across terminals (spec: 800-1,500 ohms; values outside this range indicate failure) Voltage Test (hall-effect sensors): With the key on (engine off), measure voltage at the sensor’s power pin (spec: 4.8-5.2V; low voltage indicates wiring/power issues) Ground Test: Measure resistance between the sensor’s ground pin and vehicle ground (spec: <0.5 ohms; higher values indicate ground circuit problems)
- Mechanical Alignment Check: Measure the gap between the sensor and target ring (use a feeler gauge): Spec: 0.5-1.5mm (varies by manufacturer) Gaps >2mm reduce signal strength; adjust or replace mounting brackets if needed Inspect the target ring for missing teeth, warping, or damage (use a borescope if inaccessible)
| Issue Type | UR1000 Data Indicators | Physical/Electrical Findings |
|---|---|---|
| Weak CKP Sensor | Signal voltage <0.3V (inductive), irregular pulses at idle | Contaminated sensor tip, resistance >1,500 ohms |
| Corroded Connector | Intermittent signal drops, voltage fluctuations ±0.2V | Green/white corrosion in connector, high resistance (>1 ohm) in circuit |
| Misaligned Sensor | Low signal amplitude, consistent but weak voltage | Gap >2mm between sensor and target ring, loose mounting bolts |
| Damaged Target Ring | Erratic pulse pattern, missing pulses at specific RPM | Missing teeth or warping on crankshaft/camshaft ring |
6. Step-by-Step P0321 Repairs (From Sensors to Wiring)
The right P0321 repair depends on your diagnosis. Below are detailed, DIY-friendly procedures for the most common fixes—with tips to avoid mistakes:
Crankshaft/Camshaft Position Sensor Replacement
For weak or failed sensors (40% of P0321 cases):
- Safety Preparation: Disconnect the negative battery terminal (prevents electrical shorts) Relieve fuel pressure (follow vehicle-specific procedure—usually by removing the fuel pump fuse and cranking the engine) Gather tools: Socket set (10mm-14mm), ratchet, extension, torque wrench, dielectric grease, clean rags
- Sensor Removal: Locate the faulty sensor (use UR1000’s component location guide) Disconnect the electrical connector: Press the tab and pull straight back (use contact cleaner if stuck) Remove mounting bolts (1-2 bolts, typically 10mm or 12mm): For CKP: Be careful not to drop bolts into the oil pan or bellhousing For CMP: Avoid damaging nearby timing components Remove the sensor: Twist gently if stuck (do not force—this may damage the mounting surface)
- Mounting Surface Preparation: Clean the sensor’s mounting hole with a wire brush (remove oil, dirt, or debris) Inspect the target ring for damage (replace if teeth are missing or warped) Check for oil leaks around the sensor (fix leaks before installing the new sensor)
- New Sensor Installation: Compare the new sensor to the old one (ensure identical design—aftermarket sensors may have different connectors) Apply a thin layer of dielectric grease to the sensor’s O-ring (if equipped) Position the sensor: For CKP/CMP with adjustable gaps: Use a feeler gauge to set the gap to 0.5-1.5mm For fixed-mount sensors: Align with the target ring and push into place Install mounting bolts: Torque to specification (5-10 ft-lbs—over-tightening breaks the sensor) Reconnect the electrical connector: Apply dielectric grease to terminals to prevent corrosion
- System Reset & Testing: Reconnect the battery terminal Use the UR1000 to clear P0321 and related codes Perform a "Sensor Relearn" procedure (UR1000 has a dedicated function for this): Start the engine and let it idle for 5 minutes Accelerate to 3,000 RPM and hold for 30 seconds Decelerate to idle and turn off the engine Test drive: Monitor sensor signals with UR1000 to confirm voltage is within specifications
Wiring & Connector Repair
For corroded, damaged, or loose electrical connections (30% of P0321 cases):
- Problem Identification: Use the UR1000’s "Circuit Test" feature to locate high-resistance areas (usually near connectors or harness bends) Mark damaged sections (e.g., frayed wires, corroded pins)
- Connector Repair: Disconnect the battery and sensor connector Clean corrosion: Spray electrical contact cleaner into the connector Scrub pins with a small wire brush (avoid bending pins) Dry thoroughly with compressed air Repair bent pins: Use a small screwdriver or pin straightener to realign (replace the connector if pins are broken) Apply dielectric grease: Coat terminals with a thin layer to repel moisture
- Wiring Repair: For frayed/broken wires: Cut the damaged section (leave 1 inch of undamaged wire on each side) Strip 1/4 inch of insulation from both ends Connect using heat-shrink butt connectors: Crimp with a ratchet crimper (not pliers—ensures proper connection) Apply heat to shrink the tubing (use a heat gun, not a lighter) For abraded insulation: Wrap the damaged area with electrical tape (3 layers) Cover with wire loom for added protection Secure the repaired harness: Use zip ties to route away from heat sources and moving parts
- Verification: Test circuit resistance with a multimeter (should be <0.5 ohms) Use the UR1000 to monitor sensor signals during idle and acceleration Clear codes and test drive to confirm no P0321 return

Mechanical Alignment & Target Ring Repair
For sensor-to-ring misalignment or damaged target rings (18% of P0321 cases):
- Alignment Adjustment: Loosen the sensor’s mounting bolts (do not remove) Use a feeler gauge to set the gap to 0.5-1.5mm (refer to vehicle specs) Tighten the bolts incrementally (alternate if 2 bolts) to maintain alignment Verify gap with the feeler gauge after tightening
- Target Ring Replacement (if damaged): For Crankshaft Rings: Remove the crankshaft pulley or harmonic balancer (use a puller tool) Slide the old ring off the crankshaft (may require gentle prying) Install the new ring: Align with the crankshaft keyway and press into place Reinstall the pulley/balancer (torque to specification) For Camshaft Rings: Remove the camshaft cover or timing cover (follow timing chain/belt procedures) Replace the ring (often part of the camshaft gear) Reassemble and set engine timing (critical—use a timing tool kit)
- Final Testing: Use the UR1000 to check CKP-CMP synchronization Monitor sensor signals during cold start and warm operation Clear codes and test drive for 50+ miles to ensure P0321 does not return
7. P0321 Repair Costs & Money-Saving Tips
P0321 repair costs vary widely based on the cause, vehicle, and whether you DIY or hire a professional. Below is a detailed breakdown in both list and table format:
DIY Repair Costs (Table)
| Repair Item | Estimated Cost | Breakdown | Notes |
|---|---|---|---|
| CKP/CMP Sensor Replacement | $35–150 | Sensor ($30–120), grease ($5), O-rings ($0–25) | OEM sensors cost ~2x more but last longer |
| Wiring/Connector Repair | $10–40 | Heat-shrink ($5–15), cleaner ($5–10), loom ($0–15) | Basic tools usually already owned |
| Alignment Tools & Supplies | $15–50 | Feeler gauge ($10–25), torque wrench rental ($0–25) | Torque wrench is critical to avoid over-tightening |
| Target Ring Replacement | $40–200 | Ring ($35–150), puller ($0–50), timing tools ($0–100) | Attempt only if experienced with engine timing |
Professional Repair Costs (Table)
| Repair Item | Estimated Cost | Breakdown | Notes |
|---|---|---|---|
| Sensor Replacement (Pro) | $150–350 | Labor ($100–180), OEM sensor ($50–170), supplies ($0–30) | Dealerships charge 20–30% more |
| Wiring Repair (Pro) | $200–400 | Labor ($150–250), parts ($50–150), diagnostics ($0–100) | Harness replacement adds $150–300 |
| Target Ring & Timing Repair (Pro) | $500–1,200 | Labor ($300–600), parts ($200–600), timing kit ($0–300) | Most expensive—requires engine disassembly |
| ECM Programming/Repair | $300–800 | Labor ($100–200), programming ($100–300), ECM repair ($100–300) | Rare—only for software/calibration issues |
Expert Money-Saving Tips
- Diagnose first with UR1000 – 70% of P0321 cases are fixed with sensor or wiring repairs (not expensive timing work). The UR1000 ($100-200) pays for itself by avoiding misdiagnosis.
- Buy OEM or premium aftermarket sensors – Budget sensors ($20-30) fail within 6-12 months, requiring repeat repairs. Spend $50-100 on quality parts for long-term savings.
- Check for TSBs and warranties – Many manufacturers cover P0321 repairs under powertrain warranties (5 years/60,000 miles) or extended TSB programs. Use the UR1000’s TSB lookup feature to check.
- Combine repairs with maintenance – Replace sensors during timing belt/chain service (saves labor costs) and fix oil leaks that cause sensor contamination.
- Avoid unnecessary dealership visits – Independent shops charge 30-50% less for the same work. Use the UR1000 to provide shops with diagnostic data, reducing their labor time.
- Prevent secondary damage – Fix P0321 within 1-2 weeks to avoid catalytic converter damage ($800-1,500) from unburned fuel.
8. Prevent P0321: Maintenance Schedule for Long-Term Fix
Preventing P0321 requires proactive maintenance of engine speed sensors, wiring, and related components. Follow this schedule to avoid recurrence:
Regular Inspection Schedule
- Monthly Checks (5 Minutes): Use the UR1000 to scan for pending P0321 codes (even if the check engine light is off) Monitor CKP/CMP signal voltage at idle (should be stable within specifications) Check for oil leaks around sensor locations (use a flashlight to inspect under the engine)
- Every 30,000 Miles (30 Minutes): Inspect sensor connectors: Disconnect and clean with contact cleaner Apply fresh dielectric grease Reconnect and verify tight fit Check wiring harnesses: Look for abrasion or loose routing Secure with zip ties if needed Add loom to sections near heat sources Test sensor resistance with a multimeter (compare to baseline readings taken when new)
- Every 60,000 Miles (1 Hour): Perform a deep sensor cleaning (for inductive sensors): Disconnect the sensor Clean the magnetic tip with a soft brush and brake cleaner Inspect for damage and reinstall Check sensor alignment and gap (adjust if >1.5mm) Inspect target rings for wear (use a borescope if accessible) Replace engine oil and filter (clean oil prevents sensor contamination)
- Every 100,000 Miles (During Timing Service): Replace CKP/CMP sensors as preventive maintenance (even if working) Inspect or replace target rings (especially in high-mileage vehicles) Replace timing components (chain/belt, tensioners) to prevent alignment issues Update ECM firmware (check for TSBs using UR1000)
Protective Measures
- Sensor Protection: Apply heat-resistant paint to sensor housings (for sensors near exhaust components) Install custom heat shields (available for high-performance vehicles) Fix oil leaks immediately—oil contamination is the #1 cause of sensor failure
- Wiring Harness Care: Use split loom to protect harnesses near moving parts Secure loose sections with adhesive clips (avoid zip ties that cut into insulation) Apply dielectric grease to all electrical connections annually
- Driving Habits: Avoid short trips (<10 minutes) that prevent the engine from reaching operating temperature (moisture damages sensors) Use quality engine oil (meets manufacturer specs) to reduce metallic debris Avoid harsh off-road driving that can damage sensor mounting brackets
Recommended Tools & Products
- Diagnostic Tools: iCarzone UR1000 (for sensor signal monitoring and TSB lookup) Digital multimeter (auto-ranging, for resistance/voltage tests) Feeler gauge set (0.02-0.06 inch, for gap adjustment)
- Maintenance Supplies: Electrical contact cleaner (non-corrosive, like CRC QD Electronic Cleaner) Dielectric grease (silicone-based, like Permatex Dielectric Grease) Sensor-safe brake cleaner (for cleaning sensor tips) Heat-shrink tubing and butt connectors (for wiring repairs)
- Protective Products: Wire loom (split, for harness protection) Heat-resistant paint (for sensor housings) Adhesive wire clips (for secure routing)
9. P0321 FAQs (Answered by Auto Techs)
Short distances (5-10 miles) are possible if symptoms are mild, but long-term driving risks stalling, no-start, or catalytic converter damage. Fix P0321 promptly—especially if you notice stalling or power loss.
It depends: 40% of P0321 cases are sensor-related, but 60% are wiring, alignment, or mechanical issues. Use the UR1000 to test signal quality first—replacing a good sensor wastes money.
P0321 = weak/irregular CKP/CMP signal (sensor still produces data, but it’s unreliable). P0335 = complete CKP circuit failure (no signal at all). P0321 often progresses to P0335 if ignored.
Low battery voltage (<12V) can temporarily weaken sensor signals, but P0321 usually persists after charging. If the code clears with a new battery, monitor for recurrence—true P0321 requires sensor/wiring repair.
DIY sensor replacement: 1-2 hours. Wiring repair: 1.5-3 hours. Timing/target ring work: 3-6 hours. Professional repairs take 50-75% less time if they have the UR1000’s diagnostic data.
Common reasons: 1) Used a low-quality sensor, 2) fixed the root cause (e.g., oil leak causing contamination), 3) Improper alignment/gap, 4) Hidden wiring damage. Use the UR1000 to verify signal quality after repair.
Often yes: CKP/CMP sensors are part of the powertrain, covered for 5 years/60,000 miles (federal minimum). Check for TSBs—many manufacturers extend coverage for P0321-related issues.
Only if contamination is the issue: Clean inductive sensors with brake cleaner and a soft brush. Hall-effect sensors cannot be cleaned—internal chip damage requires replacement. Use the UR1000 to test after cleaning.
10. Final Thoughts: Fix P0321 Confidently
P0321 is a manageable issue—if diagnosed correctly. It signals weak or irregular engine speed sensor signals (CKP/CMP) that, left unaddressed, can lead to stalling, no-start, or expensive catalytic converter damage. The key to successful repair is distinguishing between sensor failure, wiring issues, and mechanical alignment problems—something the iCarzone UR1000 simplifies with its raw signal monitoring and TSB lookup features.
Most P0321 cases are fixed with sensor replacement ($35-150 DIY) or wiring repair ($10-40)—no expensive engine work needed. By following the step-by-step diagnosis and repair procedures in this guide, you can avoid misdiagnosis and save $150-800 in professional labor costs.
Remember: Prevention is key. Regular sensor inspections (with the UR1000), prompt oil leak repairs, and quality parts will keep P0321 from recurring. For DIYers, the UR1000 is an essential tool—it turns complex sensor data into actionable insights, making P0321 repairs accessible even for beginners.
Fix P0321 Fast With UR1000
The iCarzone UR1000 lets you test CKP/CMP signals, check alignment, and verify repairs—all with professional-grade accuracy. Avoid guesswork and save on parts/labor.
Get UR1000 for P0321 Diagnosis →